Quick start project
Develop, compile, and run a sample HMI FactoryTalk Optix Application that demonstrates FactoryTalk Optix Studio capabilities.
Tip:
-
Test your application by selecting
 Run to run your project using the client emulator on your development computer.
 -
Save changes periodically by pressing or selecting
 Save from the toolbar.
 -
You can download, extract, and open the finished project to investigate its components and settings: QuickStart.zip
Prerequisites
To develop the project
-
Configure and brand the main window:
- Configure the main window.
- Configure a logo.
- (optional) Save and commit changes.
Figure 1. Blank main window with a custom title and logo 
-
Configure panels and tab-based navigation:
Figure 2. Navigation panel with blank panels 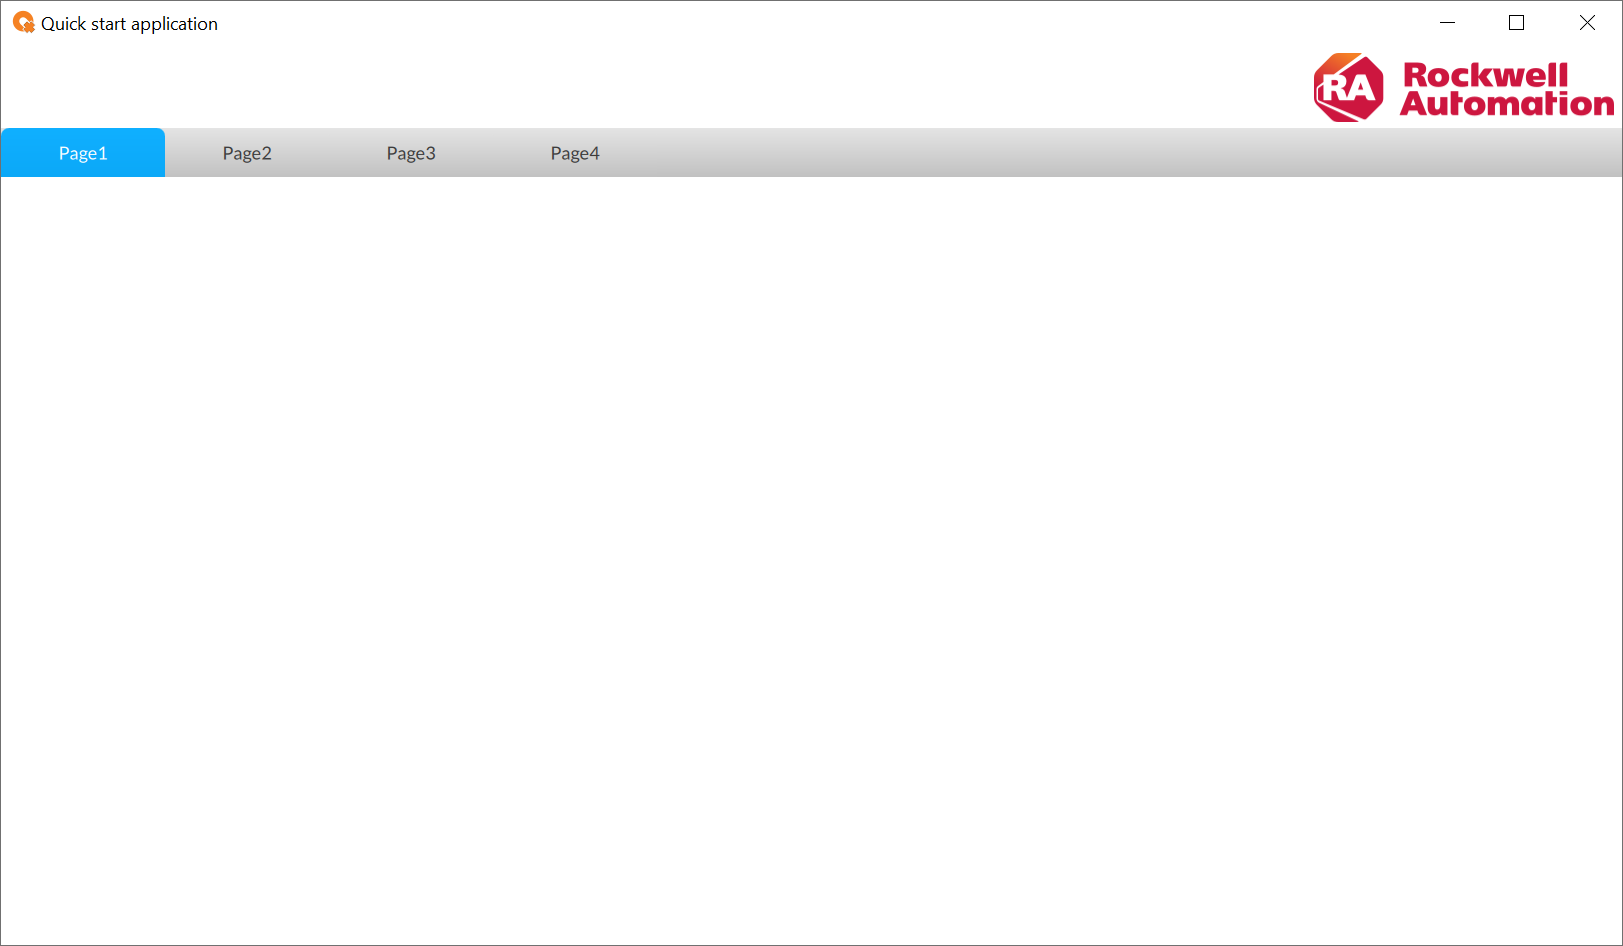
-
Configure dynamic graphic objects:
- Add graphic objects.
- Associate the LED status with the switch.
- Associate the LED color with the spin box.
- (optional) Save and commit changes.
Figure 3. Page1 panel with dynamic graphic objects 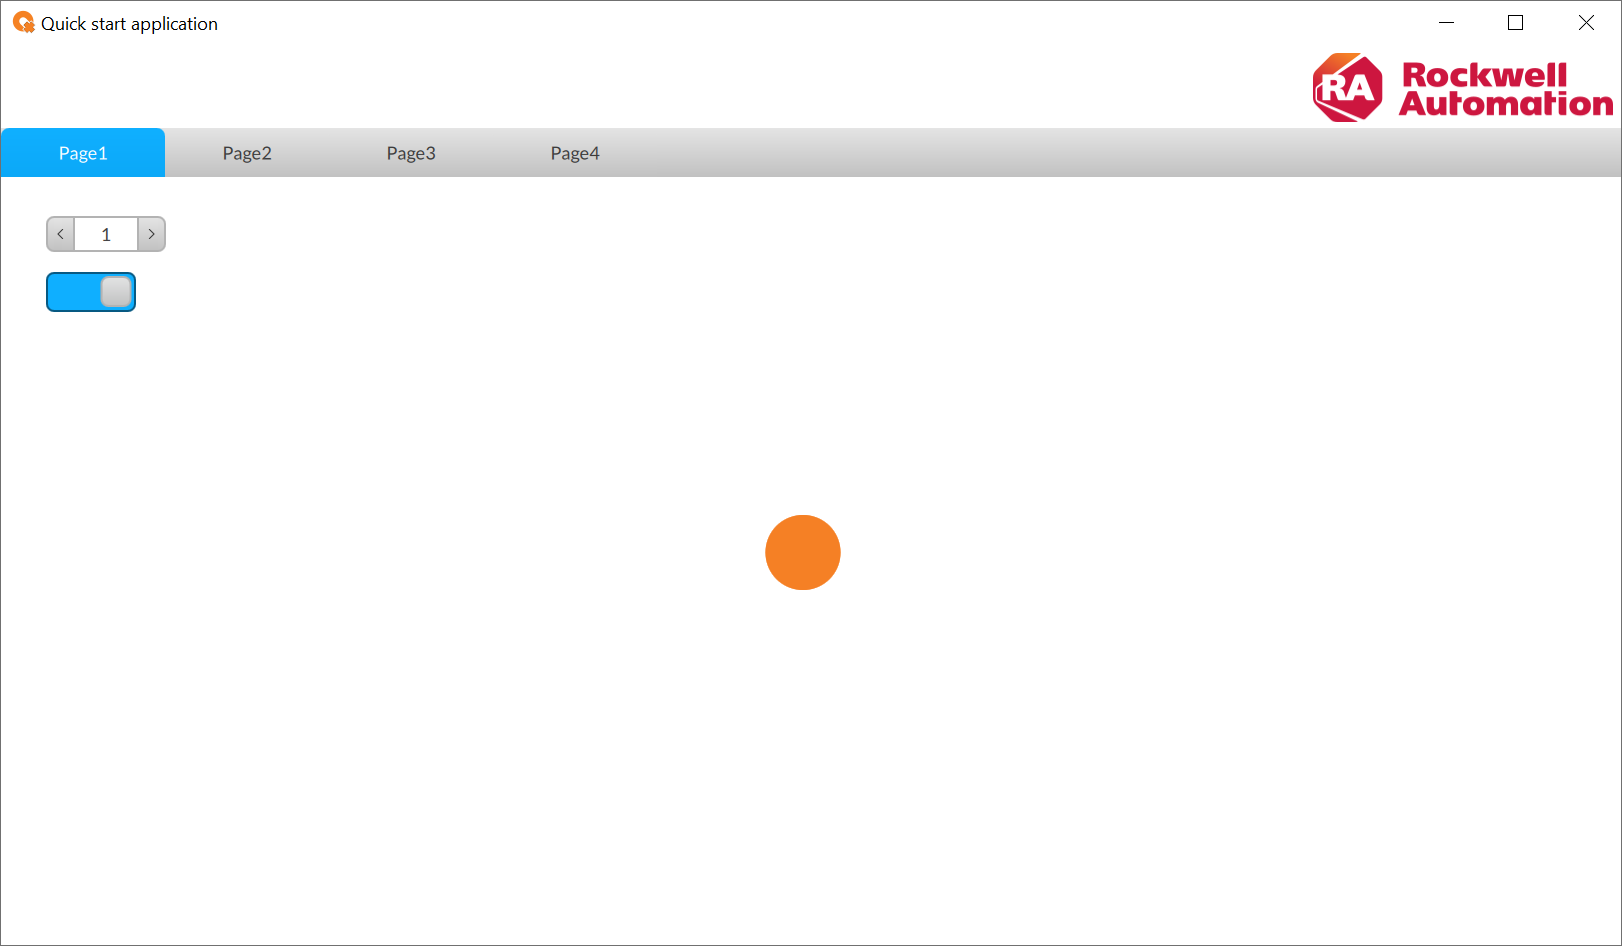
-
Configure variables and add temperature controls:
- Create variables or Import controller variables.
- Configure temperature controls.
- (optional) Save and commit changes.
Figure 4. Page1 panel with dynamic graphic objects and temperature controls 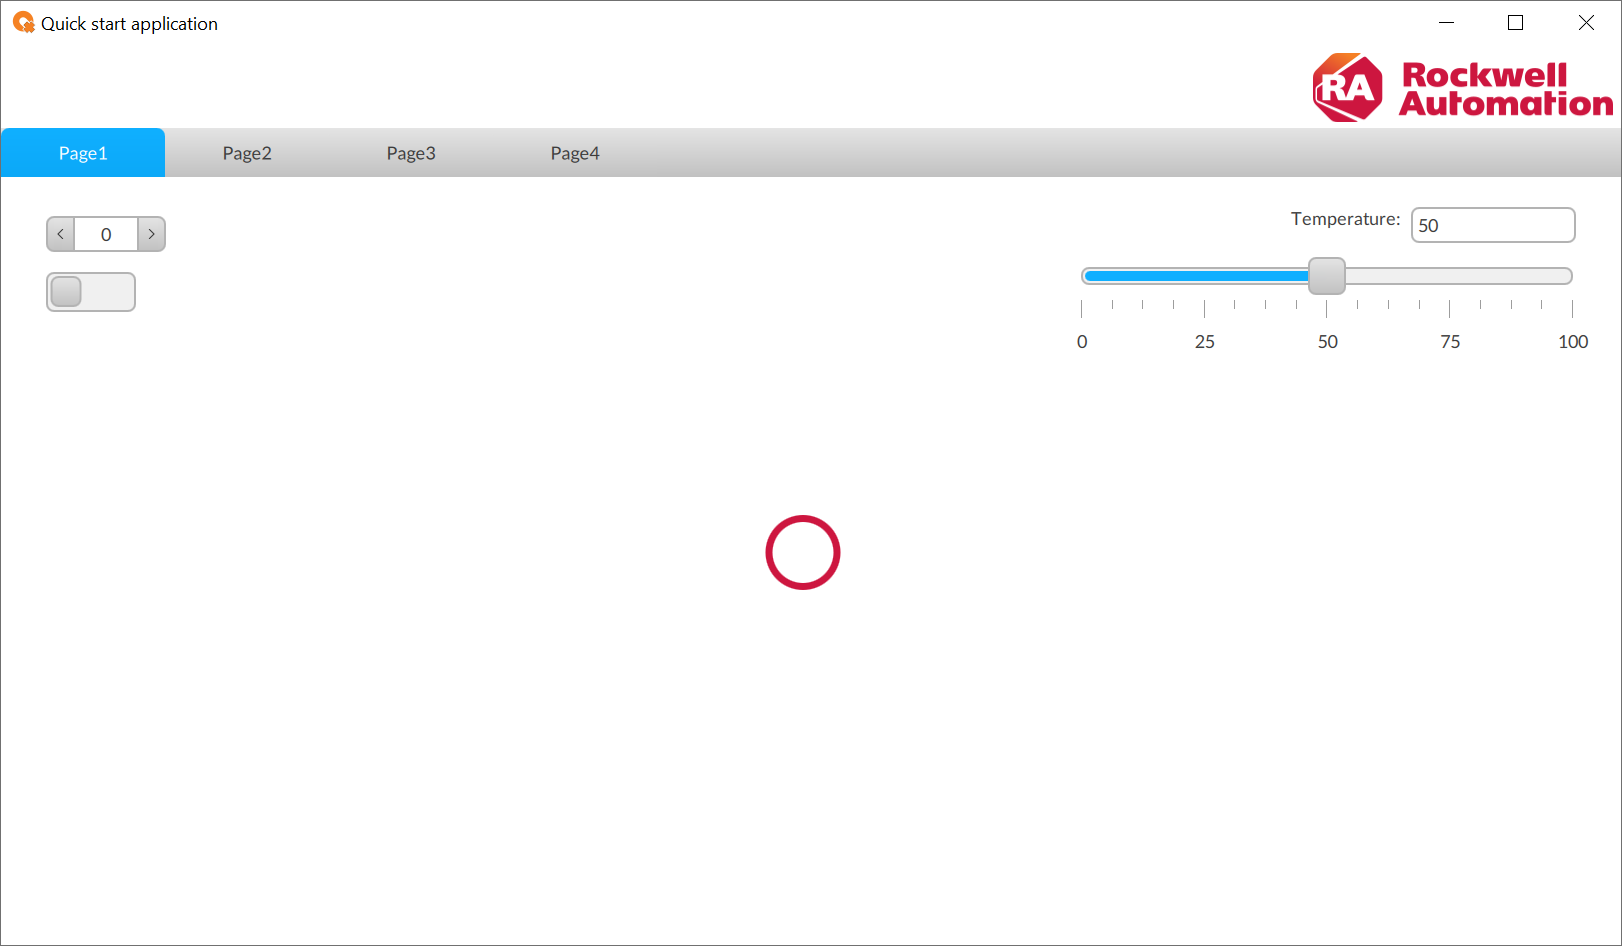
-
Configure alarms:
- Configure a digital alarm.
- Configure an alarm grid.
- Configure an alarm event logger.
- Configure a widget to display logged alarms.
- Configure a switch to simulate alarms.
- (optional) Save and commit changes.
Figure 5. Page2 panel with active alarms grid 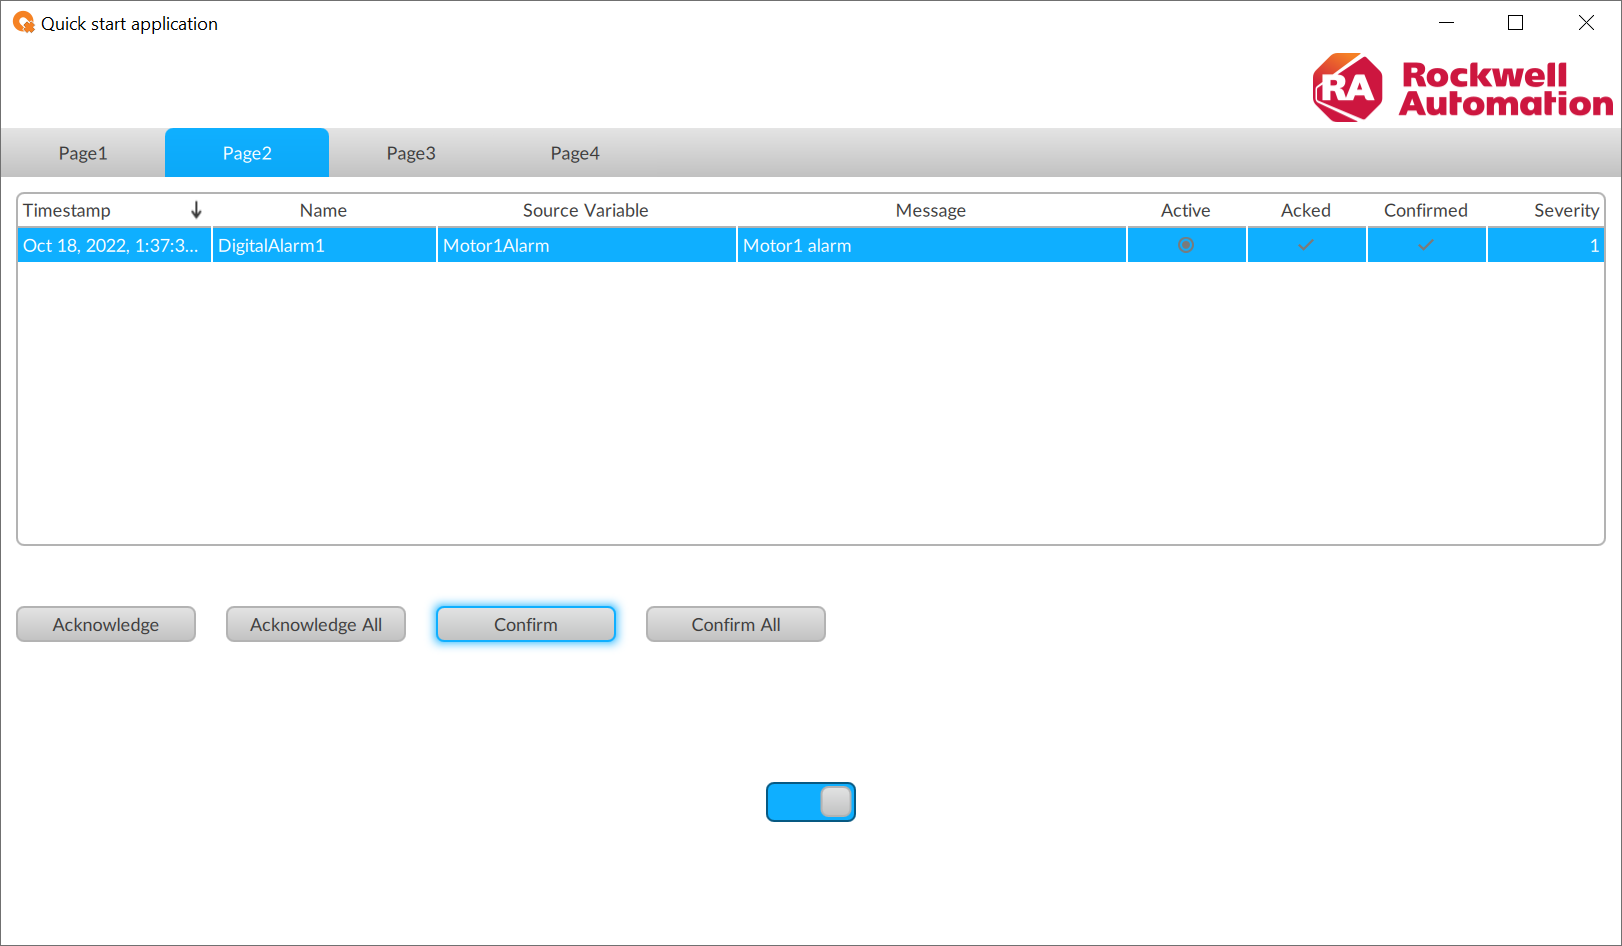
Figure 6. Page3 panel with alarm events history 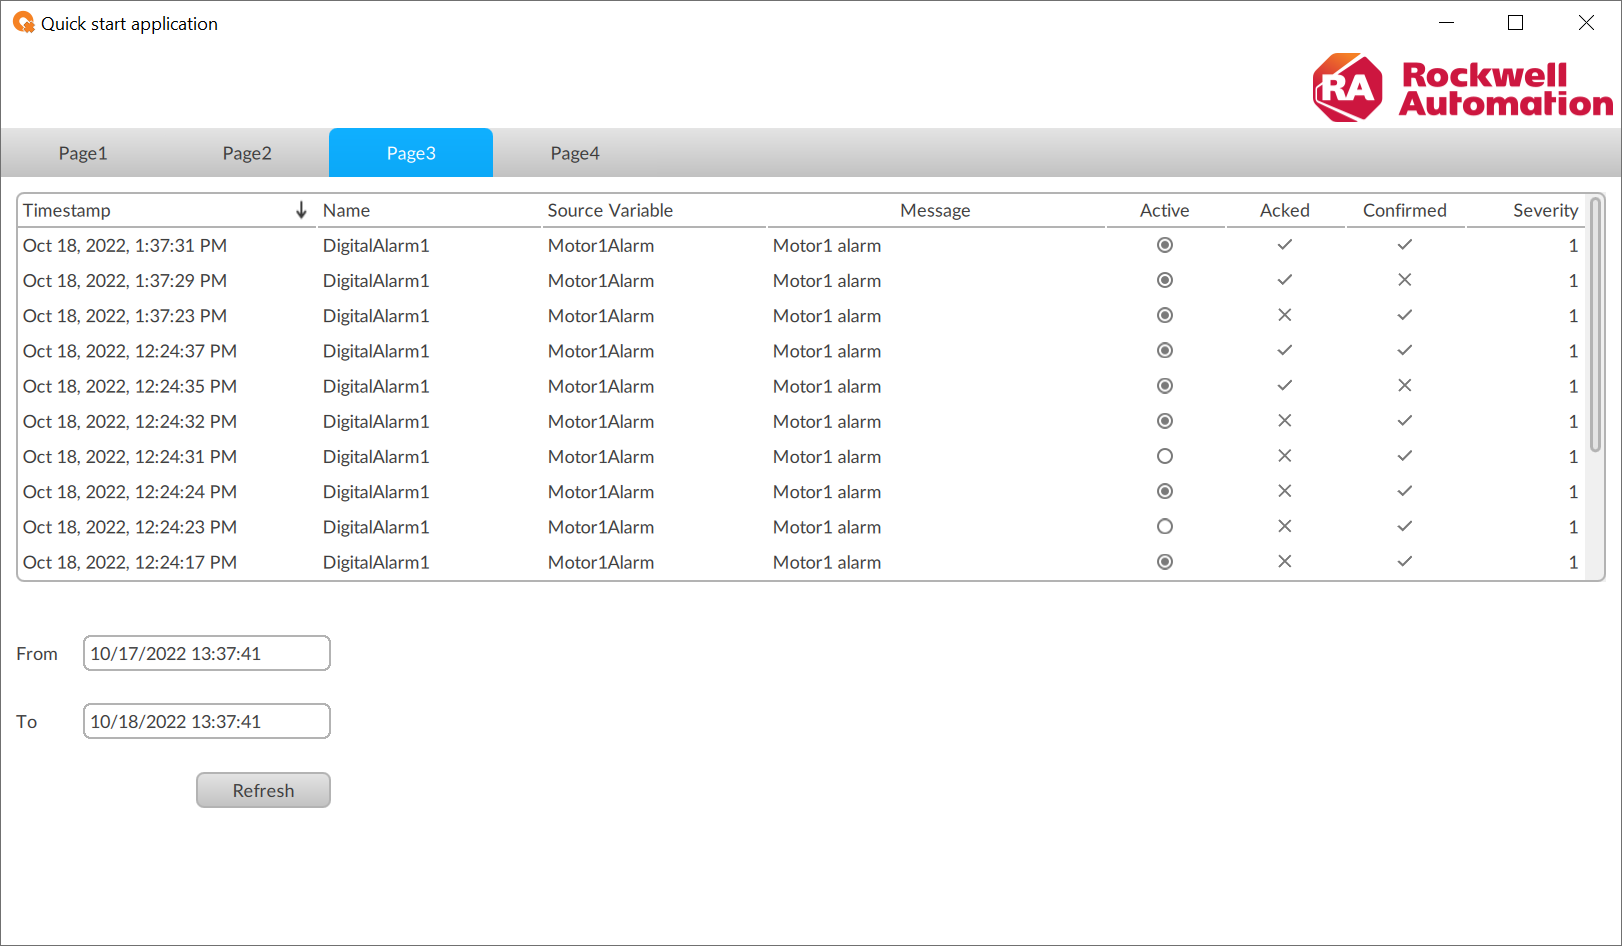
-
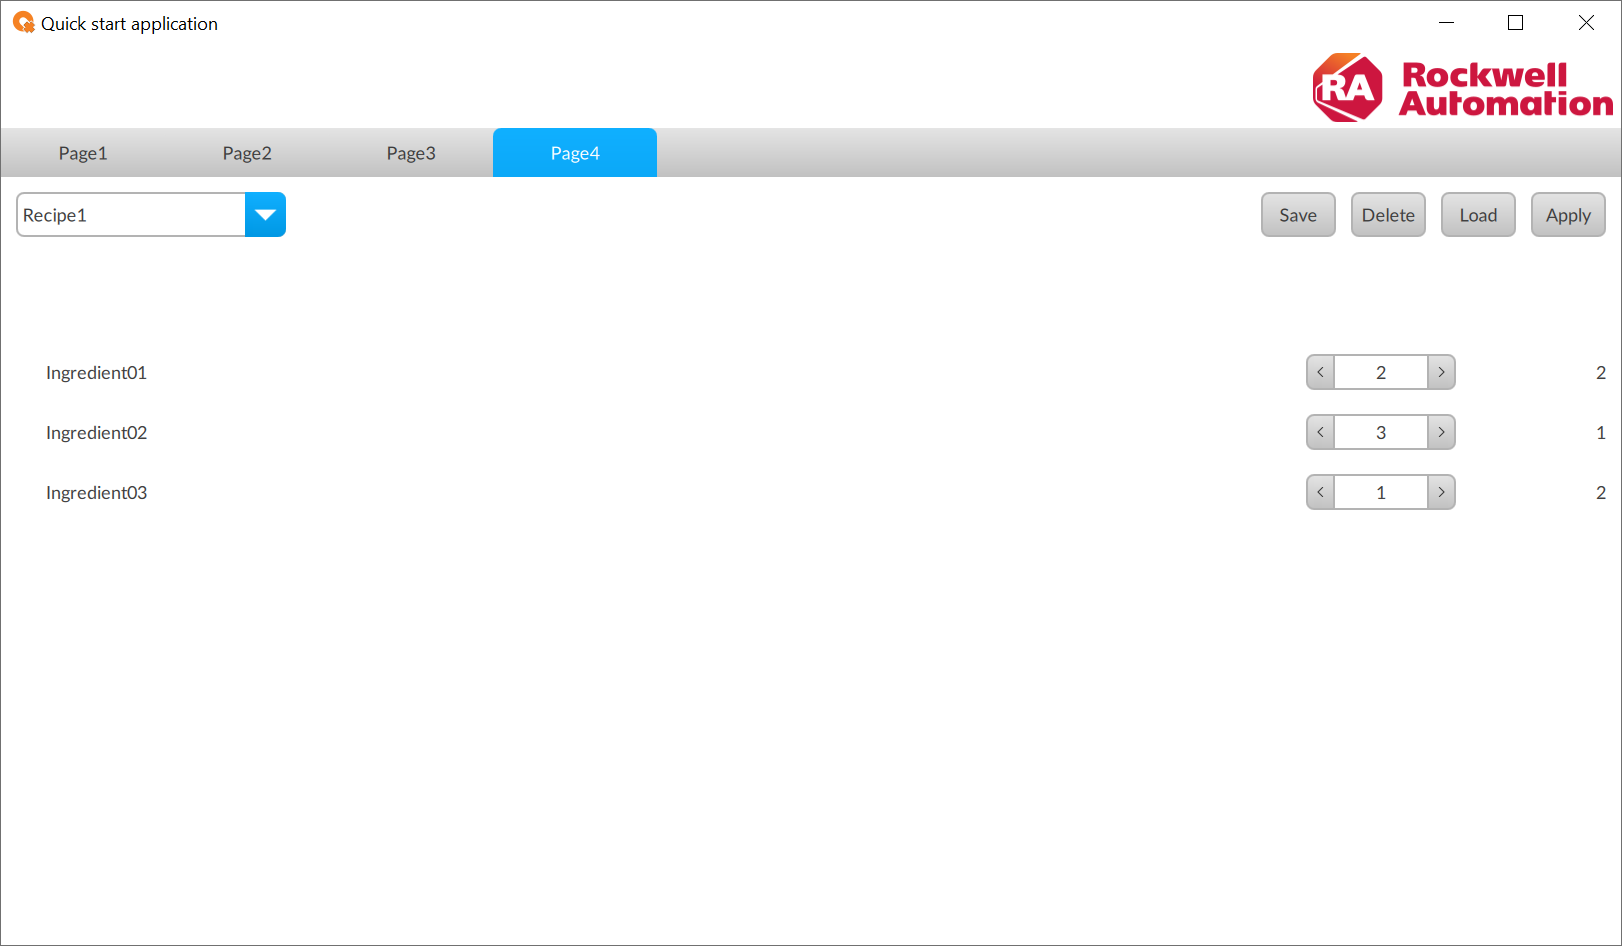
Configure recipes:
Figure 7. Page4 panel with recipes editor