Create a data grid
Create a grid from data gathered by the event logger.
Tip: Instead of creating this widget from scratch, you can add Alarms Event Logger from Template Libraries and then modify it accordingly.
-
Create a data grid:
-
Create a complex dynamic link:
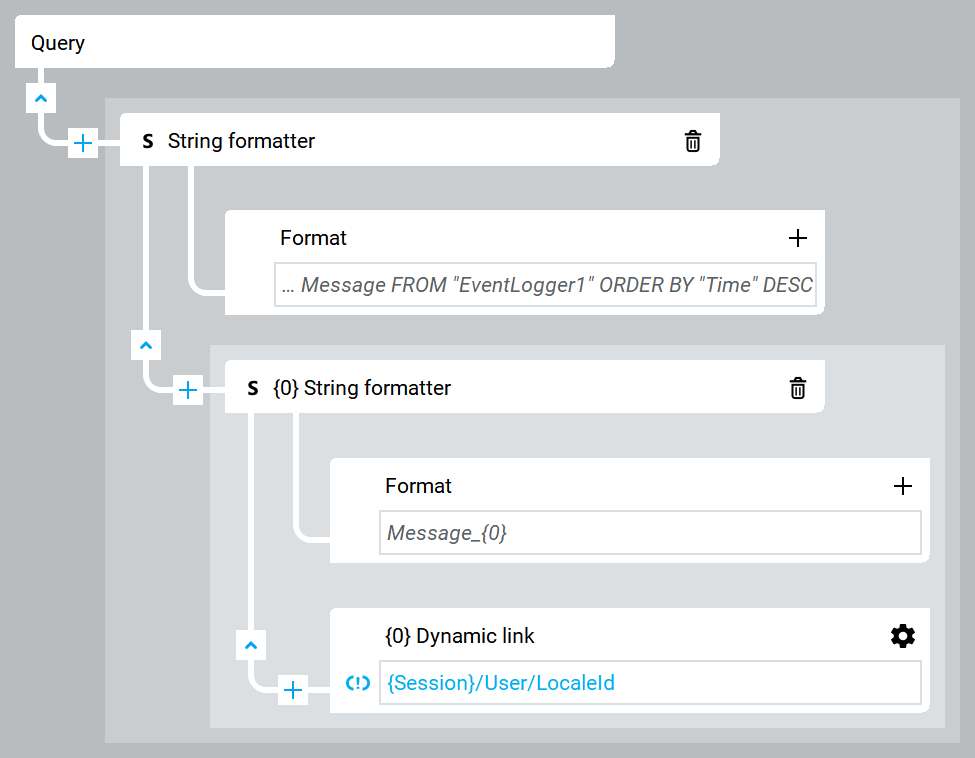
- StringFormatter1
-
- Format
- SELECT ActiveState_Id, AckedState_Id, ConfirmedState_Id, Time, Severity, {0:sql_identifier} AS Message FROM "EventLogger1" ORDER BY "Time" DESC
- {0} StringFormatter1
-
- Format
- Message_{0}
- {0} DynamicLink
- {Session}/User/LocaleIds[0]
For more information about dynamic links, see Create dynamic links.
-
Create a complex dynamic link:
Configure data grid columns:
-
Configure the active state column:
-
Under DataItemTemplate, create a complex dynamic link:
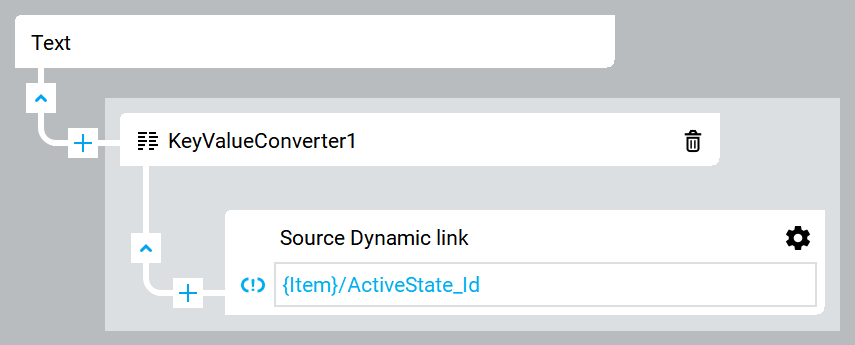
- KeyValueConverter1
-
- Source DynamicLink
- {Item}/ActiveState_Id
For more information about dynamic links, see Create dynamic links.
-
Under DataItemTemplate, create a complex dynamic link:
-
Configure the acknowledged state column:
-
In Properties, next to Columns, select
 and select Text column.
-
Under DataItemTemplate, create a complex dynamic link:

- KeyValueConverter1
-
- Source DynamicLink
- {Item}/AckedState_Id
For more information about dynamic links, see Create dynamic links.
-
In Properties, next to Columns, select
-
Configure the confirmed state column:
-
In Properties, next to Columns, select and select Text column.
-
Under DataItemTemplate, create a complex dynamic link:
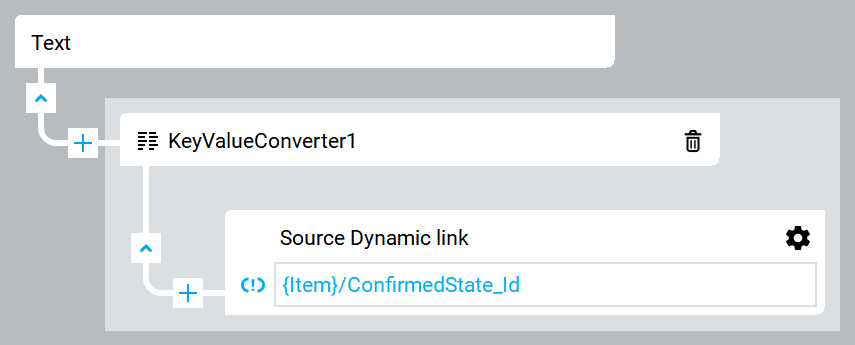
- KeyValueConverter1
-
- Source DynamicLink
- {Item}/ConfirmedState_Id
For more information about dynamic links, see Create dynamic links.
-
In Properties, next to Columns, select
-
Configure the time column:
-
In Properties, next to Columns, select and select Text column.
-
In Properties, next to Columns, select
-
Configure the message column:
-
In Properties, next to Columns, select and select Text column.
-
In Properties, next to Columns, select
-
Configure the severity column:
-
In Properties, next to Columns, select and select Text column.
-
In Properties, next to Columns, select